
Coin Photo Quality Guide for Accurate Identification
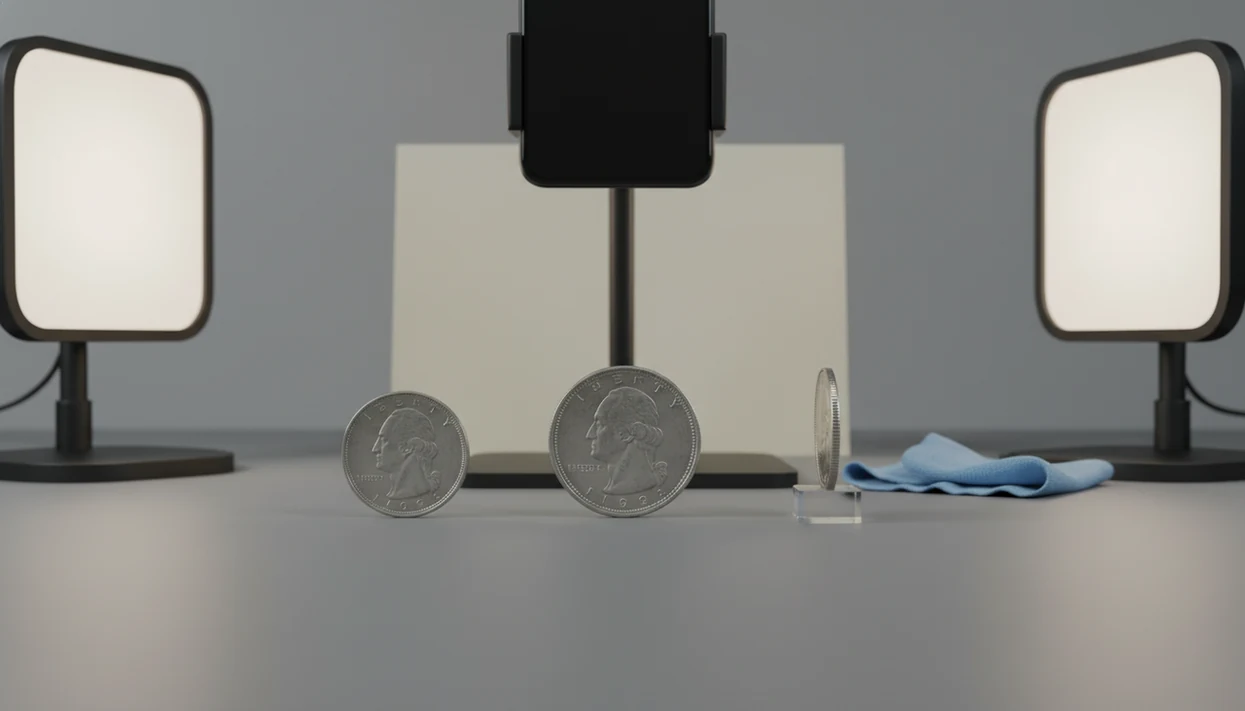


A coin photo quality guide helps you take sharper, better-lit coin images so AI apps and human collectors can read the date, mint mark, rim, edge, and surface details with fewer false matches. Use a plain background, diffuse lighting, steady focus, and multiple views before relying on an identification or value estimate.
> A coin identification photo set should show the obverse, reverse, edge, and important close-up details clearly enough for the date, mint mark, legends, rim, and surface condition to be reviewed.
TL;DR
- Take at least three photos for identification: obverse, reverse, and edge.
- Use diffuse, even lighting and avoid glare, shadows, filters, and heavy editing.
- Add close-ups of the date, mint mark, rim, edge, and unusual surface details when rarity or variety may matter.
Coin Photo Quality Standards at a Glance
Good coin photos are clear, evenly lit, and complete enough to support identification without guessing. Use this five-point check before you upload, share, or save images.
- Minimum useful views: photograph the obverse, reverse, and edge; add close-ups when the date, mint mark, or variety may matter.
- Readable details: the date, mint mark, legends, rims, and surface texture should stay sharp when you zoom in.
- Plain background: use black, white, gray, or another neutral surface with the full coin visible.
- Even lighting: avoid glare, dark shadows, and washed-out highlights that hide wear or scratches.
- Consistent framing: keep distance, angle, and crop similar across a collection.
A beginner turning over a wheat cent under a kitchen light usually finds the problem fast. The date looks fine, but the tiny mint mark under it disappears.
Small details decide the match.
Before You Photograph a Coin
Before you photograph a coin, set up the work area so the image records the coin, not the room around it. A few minutes of preparation prevents glare, mixed-up groups, and accidental surface damage.
- Gather a plain matte background, soft light, a phone stand or stable support, and a clean surface before the coin comes out.
- Remove the coin from reflective plastic only when it is safe and appropriate. If the holder protects a fragile, valuable, or labeled piece, photograph through it first and note any glare.
- Avoid cleaning, polishing, rubbing, or dipping the coin before identification photos. Natural wear, toning, scratches, and residue may all matter.
- Sort large groups by size, denomination, country, or obvious type before shooting. A row of similar coins is easier to track than a pile from a jar.
- Decide whether the basic set needs extras: a scale reference, an edge view, or close-ups of the date, mint mark, rim, lettering, or suspected variety.
This setup keeps the photo session calm, especially when you are working through inherited coins or mixed circulation finds.
AI Coin Identification and Photo Detail Requirements
AI coin identification works by comparing visible design features, not just by noticing that an object is round and metallic. Human reviewers use the same basic evidence: portrait, legends, date, mint mark, rim shape, reverse design, and metal color.
> Coin recognition depends on visible coin-specific features such as portraits, inscriptions, dates, mint marks, rims, and surface patterns; poor image quality can turn those features into false matches.
Recognition systems often use image embeddings, which are mathematical summaries of what appears in the photo. In plain English, the app is comparing patterns. If glare covers Liberty’s hair, or a dark wooden table makes a copper cent look redder than it is, the pattern changes.
Controlled coin images generally perform better than inconsistent snapshots. Automated coin-recognition research has reported stronger results with consistent lighting, orientation, framing, and resolution. NIST smartphone image-quality research also links higher resolution and sharpness with more reliable automated visual recognition source.
A good photo-first coin identifier and value estimation app for collectors and beginners should deliver likely matches and value context, not a guaranteed attribution, certified grade, or formal appraisal.
How Coin Photography for Identification Works
Coin photography for identification works by making the coin’s design features easier to compare against known examples. Apps and collectors look for the same visible evidence: date, mint mark, legends, portrait, reverse design, rim shape, edge style, and surface clues.
Lighting, focus, angle, and background control how well those features can be recognized. Diffuse light reduces glare on high points, sharp focus keeps small lettering readable, a straight camera angle prevents the round coin from looking distorted, and a plain background helps separate the rim from the surface around it. In technical terms, better images improve feature recognition, meaning the important shapes and marks are easier to detect and compare. Showing the obverse, reverse, edge, and close-ups also reduces false matches because many coins share one familiar face but differ by reverse type, mint mark, edge lettering, or a tiny variety detail. Good photos support identification and value context, but they do not authenticate a coin, prove metal content, or assign a certified grade.
How to Use This Coin Photo Quality Guide
Use this guide as a short pre-upload routine, especially when the coin might be old, foreign, silver, damaged, or a possible variety. For a full phone workflow, our guide on how to identify coins with phone covers the scanning process after the photos are ready.
- Set the coin on a plain, non-reflective background so the rim stays easy to separate from the surface.
- Place diffuse light above and slightly in front of the coin, not directly into the camera.
- Stabilize the phone with a stand, tripod, or book stack, then tap to focus on the coin’s details.
- Capture all views: obverse, reverse, edge, and close-ups of the date, mint mark, rim, or odd marks.
- Review at full size before uploading, saving, or asking another collector to identify it.
When mixed nickels, dimes, and foreign coins get poured from an inherited coffee can onto a towel, do not rush the first photo. Sort the lighting first. The guesses get better after that.
Step 1: Set Up Coin Scan Lighting Without Glare
Does coin scan lighting affect identification accuracy? Yes, because glare, blown highlights, and deep shadows can hide the exact details needed to separate one type, date, mint mark, or variety from another.
Use diffuse light from above rather than a bare flash or close side light. A desk lamp with a diffuser, window light through a curtain, or a small light tent works better than a bright phone flash. Harsh light can make luster look like damage, or make scratches vanish entirely.
Keep the same lighting when photographing a group. A coin tube labeled with blue tape is easier to review later when every dime was shot at the same angle and brightness.
NIST smartphone image-quality testing links recognition performance to measurable factors such as sharpness, resolution, noise, and exposure, so keep illumination consistent across every coin in a set source.
For identification, diffuse lighting is often better than brighter lighting because it preserves design details without creating glare.
Step 2: Lock Focus, Resolution, and Camera Distance for Coin Photo Tips
Sharp focus matters more than a dramatic close-up. Tap the coin, not the background, and make sure the date, mint mark, legends, and fine design elements stay readable at full size.
Avoid digital zoom. Take a high-resolution photo from a steady position, then crop afterward if needed. Use the phone’s 1x main lens, highest-resolution mode, and a 2- or 3-second timer. Aim for the coin to fill about two-thirds of the frame while leaving the entire rim visible. Keep the camera parallel to the coin so the circle does not become an oval and the rim does not look thicker on one side. A tripod, phone stand, book stack, or short timer can prevent the tiny shake that ruins a mint mark.
Two fingers pinching a worn cent may feel natural, but they add shadows and hide the rim. Set the coin down instead.
Higher resolution and better sharpness generally improve automated object recognition when the rest of the capture is controlled. Before accepting the image, open it full screen and check the small lettering first.
Step 3: Choose a Coin Photography Background and Scale
A coin photography background should help the camera separate the coin from everything around it. Plain black, white, gray, or matte neutral backgrounds usually work well because they reduce visual noise.
Avoid patterned fabric, wood grain, hands, reflective counters, and backgrounds close to the coin’s color. Copper on a warm brown table can look too red. A silver dime on a shiny surface can pick up reflections that look like toning or scratches.
Leave a small border around the coin without cutting off the rim. If scale matters, place a ruler or labeled holder nearby, not over the coin. Edge detection works better when the full outline is visible.
For beginners, a matte index card or plain craft paper is often easier than a display tray because it removes shadows and texture.
Step 4: Capture Obverse, Reverse, Edge, and Mint Mark Close-Ups
One clear face photo is often not enough for rarity, variety, or grade hints. A complete image set shows both main designs, the edge, and close-ups of any detail that could change the identification or value context.
Required coin views
- Obverse photo: shows the portrait or main front design, date, legends, and major devices.
- Reverse photo: shows the denomination, reverse design, inscriptions, symbols, and mint-related design clues.
- Edge photo: shows whether the edge is reeded, lettered, plain, damaged, clipped, or possibly altered.
If you are unsure how both faces should be captured, the separate guide on how to scan both sides of a coin gives a beginner-safe sequence.
Close-ups for varieties and errors
- Mint mark close-up: helps separate common circulation finds from key-date or branch-mint issues.
- Date and rim close-up: helps with doubled dies, repunched details, off-center strikes, and rim damage.
- Surface close-up: helps document scratches, corrosion, cleaning, die cracks, or unusual texture.
PCGS Photograde uses standardized reference imagery across many U.S. coin types, showing why consistent photos help people compare wear and surface detail more reliably source.
For variety checks, close-up photos are often more useful than one full-coin image because the deciding feature may be smaller than a letter.
Common Coin Photo Mistakes That Cause False Identification
Most failed coin scans come from a small set of photo problems. The date may be visible, but the mint mark, legends, rim, or reverse design may not be clear enough for a confident match.
Common issues include blurry photos, flash glare, steep angles, heavy filters, and busy backgrounds. Photos taken through plastic flips can also add reflections or blur. Wipe dust from a cardboard 2x2 flip if needed, but do not clean the coin itself. Cleaning can permanently change the surface. The U.S. Mint gives the same collector-safe advice: handle coins carefully and avoid cleaning because cleaning can damage surfaces and reduce value source.
Editing rarely saves a bad original. Aggressive sharpening can create fake edges, and saturation changes can make copper, silver, or toned surfaces look different from the coin in hand.
A common question is, “Is this silver or just old?” On a 1964 dime or quarter, color alone is not enough. You still need clear date, edge, and surface photos.
Coin Photo Verification Checklist Before You Upload
Before you upload a coin photo, inspect it the way another collector or app will see it. Tools like CoinEd use photo-first identification and value context, so the image needs to show more than a centered coin. For higher-stakes decisions, compare any likely match against PCGS CoinFacts, NGC Coin Explorer, or a current coin catalog before selling or submitting the coin.
| Checkpoint | Accept the photo if... | Retake it if... |
|---|---|---|
| Date and mint mark | Both stay readable when zoomed in | One detail turns soft or grainy |
| Legends and rim | Lettering and full rim are visible | The rim is cropped or distorted |
| Surface texture | Wear, scratches, and toning look natural | Glare hides high points |
| Color | The coin looks close to its real color | It appears too warm, cool, or saturated |
| Views | Obverse, reverse, and edge are included when needed | Only one side is shown |
Save consistent images for collection notes and later comparison. CoinIdentifier can help organize scans, but the photo still sets the ceiling for the result.
Limitations
Good coin photos improve identification, but they cannot prove everything. Treat photo-based results as evidence for the next step, not as final authentication or a certified grade.
- Excellent photos may still fail to separate every visually similar die variety.
- Counterfeits, altered surfaces, tooling, and cleaned coins may require in-hand expert review.
- Weight, diameter, magnetism, metal composition, and provenance may be needed.
- Some grading questions require luster and surface inspection under controlled angles.
- Phone lens quality and sensor limits can hide micro-details, especially on small mint marks.
- There is no single universal photo standard across apps, marketplaces, and grading services.
- Plastic holders, slabs, flips, and capsules can introduce reflections, haze, or blur.
- Estimated value ranges are not formal appraisals, even when the image is excellent.
The cautious path is simple: use photos to narrow the match, then compare against a trusted reference before selling, insuring, or submitting a coin.
FAQ
How do I photograph coins for identification?
Use a plain background, soft diffuse light, a stable camera, and sharp focus. Photograph the obverse, reverse, edge, and close-ups of the date or mint mark when needed.
What lighting is best for coin photos?
Soft, diffuse, even lighting is best for coin photos because it reduces glare and deep shadows. Window light through a curtain or a diffused lamp usually works well.
Should I use flash when photographing a coin?
Direct flash usually causes glare that hides luster, scratches, and high points. Use flash only if it is carefully diffused and does not reflect back into the lens.
What background is best for coin photography?
A plain matte black, white, gray, or neutral background is best. Avoid patterns, wood grain, reflective surfaces, and colors close to the coin.
How close should I zoom in on a coin?
Avoid digital zoom and take a high-resolution photo close enough to crop clearly afterward. The date, mint mark, legends, and rim should remain sharp at full size.
Do coin edge photos matter for identification?
Yes, edge photos can show reeding, lettering, plain edges, damage, alterations, and counterfeit clues. They are especially useful when one face of the coin is not enough.
Can filters improve coin photos for scanning?
Filters and heavy edits can distort color, toning, and surface texture. For scanning, natural color and sharp original detail are safer than edited images.
Why did my coin scan fail?
A coin scan may fail because of blur, glare, angle distortion, missing reverse photos, unreadable mint marks, or background clutter. Retake the full image set before relying on the result.